Hello dear ones.
After several requests, I have put together a tutorial on how to make a Tealight Box using American sized tealights. It's very easy to create and I hope you'll find my instructions are easy to follow.
You will need:
one piece of good weight cardstock cut 7 1/4" x 10 1/4"
One piece of coordinating DP cut 4 5/8" x 3 1/8"
I piece of acetate cut 4 1/2" x 3"
Scoring tool
Scissors
Strong adhesive ( I used Scor Tape 1/8' 1/4" and 1/2")
A die for making the lid opening. I used Spellbinder Labels 10.
Die cutting machine
12 Tealights
Decorations for finishing your box.
 |
| On the long side of the cardstock score at 1 1/4, 4 1/2, 5 3/4 and 9 inches |
 |
| On the short side of the cardstock, score at 1 1/4 and 6 inches. |
 |
| Cut along all four score lines on each of the long sides to create 3 tabs on each side. Then cut a little wedge on both sides of the center tabs and the inside of each of the end tabs. |
 |
| Fold in on all score lines and burnish with your score tool. |
 |
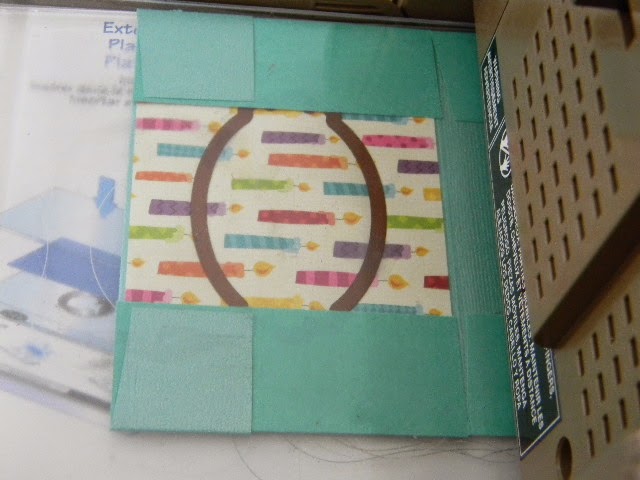
| Chose which end will be your top and adhere your designer paper to that section with 1/4" Scor Tape.(or whatever adhesive you are using. |
 |
| Now center your die on the DP. Secure it in place with a couple of pieces of removable tape. All the sides will have to be folded into the center so that it will fit through your die cutting machine. |
 |
| Fold the end of the box under then bring the end tabs up and folded to the center. They will get a bit of depression as they pass through the machine, but it doesn't affect the box in any way. You want to be sure that your die catches the edge of the part that is folded under, as that is how you create a pretty little edge on the front piece of the lid. |
 |
| Here is what it looks like when it ready to go through the machine. I don't run the entire box through the die cutting machine, only the lid portion. I run it through in one direction then back again in the opposite direction. You'll be cutting through three layers. |
 |
| Here is what it will look like when you remove the die piece. The front flap of the box will have a portion of the die cut through it. Just makes a pretty edge. |
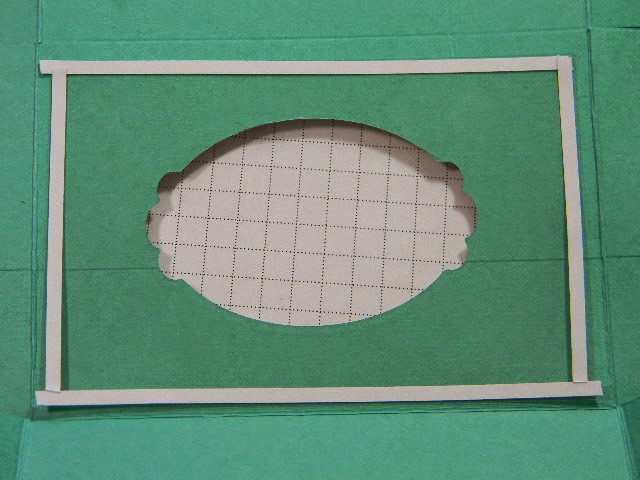 |
| Now you're ready to apply your acetate piece on the inside of the box top. I used 1/8" Scor Tape |
 |
| You will need to put adhesive on each of the tabs. I have used 1/2" Scor Tape two pieces to each tab as seen here. |
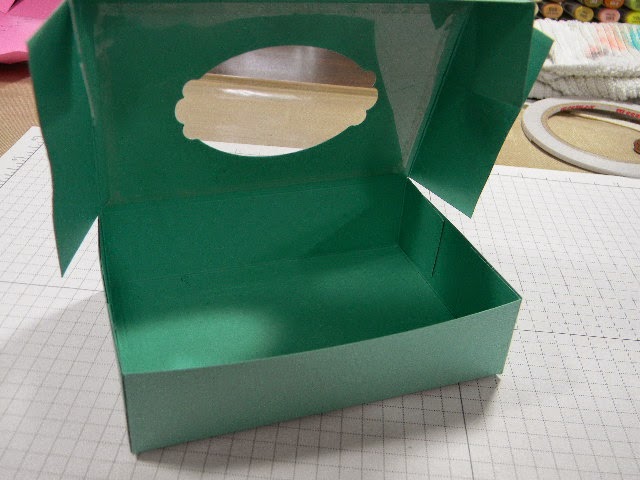 |
| Put the bottom of the box together first. Each tab will go to the inside of the sides, leaving the outside of the box smooth and finished looking. Then secure the remaining tabs to the top front of the box. |
 |
| Voila! The box is complete and ready for you to fill and decorate. |
 |
| You can see how cute those little tea lights are in your box. All 12 of them! |
 |
| So here is my finished box. I had the rimmed tag in my stash, so I added a sentiment and a few flowers. Then I tied three birthday candles with matching ribbon and glued the ribbon to the box lid. The candles are removable. |
 | ||||
| I made a second box with a Christmas theme and filled the box with Hershey's Nuggets! |
There you have it! I hope you'll give this a try and create your own theme.
Many blessing and hugs,
Barb
Wonderful, thanks Barb, will have to have a try
ReplyDeleteHugs Julie P
Wow sweet little box, will have to give it a go ...thanks for sharing.
ReplyDeleteGreat tutorial Barb!!!
ReplyDeleteThese are great! Thanks for the tutorial.
ReplyDeleteThanks so much for the tutorial! These would make great gifts.
ReplyDeleteKaren