Showing posts with label November 2010. Show all posts

Tuesday, November 30, 2010

Magnolia-licious Inspirational Challenge


This will be a very short post today, this last day of November. Inspite of my physical difficulties this past month I have been able to produce quite a few projects. 13 in all! I think that's a record for me...

Here is my card for the Magnolia-licious Challenge Blog. The theme this time around is an inspirational picture...


And here is the card I made with the inspiration I got from it...


Here is a close up of how I colored Edwin and his lights have Glossy Accents on them to give them shine, which doesn't show up in the picture. Oh well...


It's not anything fancy, but I was so inspired by Pat Frank using those little Christmas Lights on her card that I just had to give it a try. I tried very hard not to copy her's exactly, but thanks Pat for the inspiration!

Here is how I finished off the inside of the card... On the left side of the card I made a pocket for some money or a gift card...this will be going to my eldest grandson!


I appreciate your stopping by today. I will have another post tomorrow for the Magnolia-licious Highlites challenge....you're going to love that one...

Hugs and Blessings,
Barb

Monday, November 29, 2010

Thank you card...


This card started out a week ago as something just a little different. I think what turned it around for me was that I saw Pat Frank had used the same nestability and wove some pearls through it. It was just the jumpstart I needed to get over the hump and start thinking creatively again, so thanks Pat for the idea.

I have used the images of the Boutique (#535) and Shopping Tilda (#291)both available from Diana at the Magnolia-licious store. If she doesn't have them in stock at this time she will be glad to order them for you. Both images are from the Bon Voyage Collection. I found this dp by American Crafts called "I Do", that I thought would be a good match for Tilda, since I had already colored her. I have used SU Old Olive as a mat around all my panels, which are stitched by machine.

So here is a look at my card...


Here is a closer look at my Tilda...


A side view shows the dimension I achieved using mounting tape...


I just had to put some flowers onto my card! And since the colors are quite spring-like, I also added some butterflies. All the flowers are from Wild Orchid Crafts, the leaf and butterfly punches are by Martha Stewart, the bridal spray is from Michaels, the ribbon is from my stash. I always make my curlie-cues from the stems I cut off my flowers.


Now for the inside of my card. I used two JustRite stamp to make the sentiment on the inside and hung it from the tails of the ribbon like a picture hanging on the wall.

For the notation portion of the card I repeated the panel as on the front and added just a few flowers to the corner.


My signature...


Thank you so much for dropping by my blog and for leaving a comment on my creation!


Thursday, November 25, 2010

Christmas All Year Long...


Goodmorning! This is the final hop for the Christmas All Year Long Challenge. Though I started out with the greatest of intentions, other obligations have come up and I haven't been able to participate for the last several months. But, now I have my card ready and with great joy enter into this challenge. I am the first on the list so if you're beginning with me you're right on track. From here you will go over to Carole's blog. So let's get hopping, shall we?

Here is the card I made for this challenge...


As you can see I made another Stitched Card. I have used #3063 Vintage Tila from the Christmas 2010 Collection. She is available from Diana here at the store. If Diana is out of stock you can be sure that she will be getting in more very soon.

The stitching pattern is from a CD that contains a number of different books of stitching - all instructions in Dutch! It was a gift from a dear friend in Brazil!
Tilda is colored with Copics and is sitting on a piece of gingham ribbon from SU (retired) I used my MS punch in each corner (sorry I don't remember the names of my punches once I put them on my shelf and discard the box.

Here is a closer view of this little Tilda...


On the inside panels I used some generic DP that I've had for years and then added the mated panels of white using the punch around the page by Martha Stewart. The sentiment on this panel is from SU's "God's Blessings" I think it's retired as well. Again I used the ribbon and added a little Christmas tree charm from my stash.


Here is the panel where I will write a personal note. I have used the new Magnolia "Merry Christmas" sentiment at the bottom and then stamped a few snowflakes using a stamps from SU's "Short and Sweet" set.

Well I hope you're ready to head on over to Carol's blog and see what beautiful creation she has come up with.

Thanks for stopping by my blog and leaving a little love...

Maggie Blessing & Hugs,
Barb


Sunday, November 21, 2010

What else you can do with Mini's...

I told you I had been busy working with these mini's. I have a box full of stuff to be altered. I bought it all years ago when I was a SU demonstrator so that I could give some thing special as a hostess gift. Well the business went south and until now I haven't had much of a need. But with the addition of just a few mini's in my collection (which I guarantee you will grow quickly)I have found some fun things to do with them. Please check out Diana's store, she is supposed to be getting those mini's in any day now and I'm sure they will fly off the shelves.

The first little altered item is a notebook with attached pen. This is Secret Tilda and she is not a mini. I have several of these little note books, but chose this pink one and make all these altered items in a pink theme...


Here is a little jar of lip balm - so cute with the Mini Fairy on it's top...


I must have bought 50 of these little key fobs and now I'm glad I did. They've been sitting in my box for so long, but now they have some hope....


Now the last project. There are 6 little bath ball fizzes in the box. I just made a belly band to go around it and they made my own paper flowers, glimmered them up with Pearl Glimmer mist and added a rhinestone to the centers. I used my new Tilda Vintage tag and added little Fairy Tilda and tucked it under the edge of the flowers.


I am going to enter my pink and yellow Tilda in the Magnolia-licious Challenge.

Thanks for stopping by my blog today and thank you for all the wonderful comments you leave that keep me encouraged to continue crafting...

Blessings and Hugs,
Barb

These Mini's are just too much fun...

I've been working on several projects this weekend. I'm enjoying these little mini's so much. Here is a set of magnets I have altered using my mini's. I can't wait to get some more, as these are excellent for Christmas gifts to friends and neighbours...or even as a little "thank you" to someone who has done something special for you! All of these images are available from Diana at Magnolia-licious, but you may have to wait a while before they arrive.

So here they are...

Fairy Tilda...


Santa Edwin...


Starlight Tilda...


Snowy Hugs....


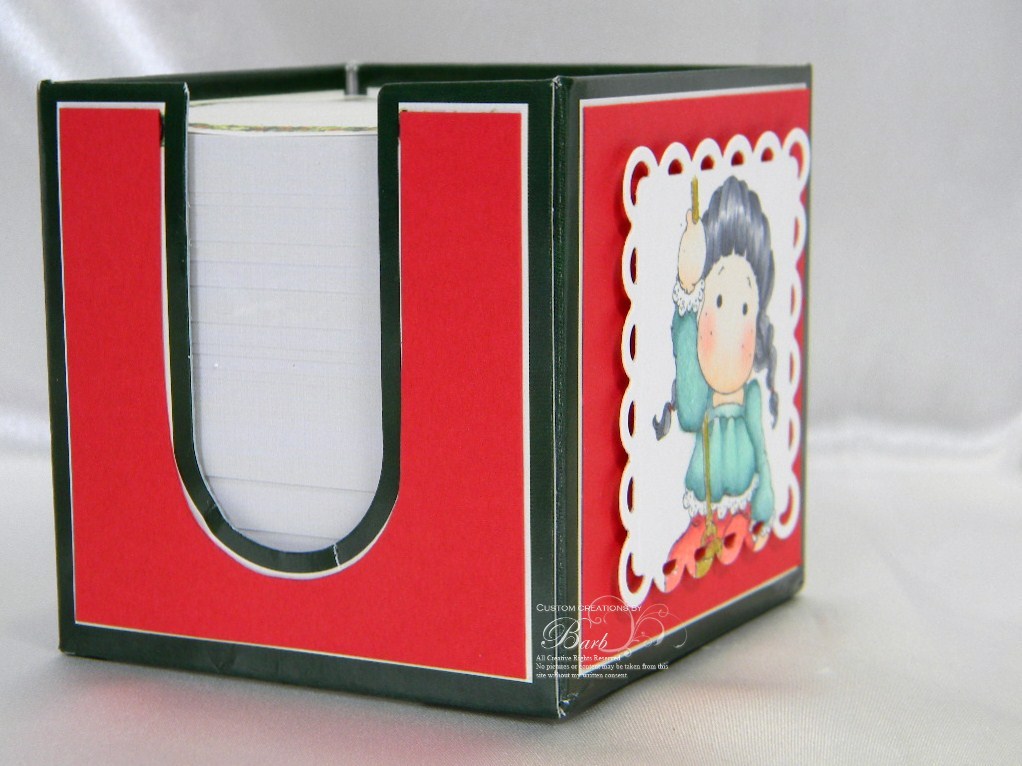
Also, I purchased at a Tuesday Mornings a cube which contains unsticky note paper. I cover all the sides with card stock and then colored three Tildas and punched them out and set them on each side....


Friday, November 19, 2010

Christmas Ornaments

What an exciting and productive day I've had today. A couple of days ago I ran out to Michael's to pick some things up for a project I was working on and as I was headed for the check out I spotted these enamel ornaments on sale so I picked up three and was planning to just color some Maggie faces and put them in. Well, all those plans fell away when I received a package from Diana with a backordered image and 3 darling Minis. I was so excited to get them that I immediately e-mailed Diana to thank her and then sat right down and colored them and made them into ornaments.

I have entered these into the icopic blog challenge which is a color challenge and ornaments.

So here is a photo of the three of them back in their boxes and ready to be given as a gift...


Here is Santa Edwin...


Snowy Hugs...


Starlight Tilda...


I'm loving these little minis and they can be used in so many places. Diana should be receiving her shipment of them soon, so be sure to head on over to the store and pick up some for yourself!

Thanks for dropping by to see my very easy and super quick project! I hope it will get your creative juices running.

Maggie Blessings and Hugs,
Barb

Wednesday, November 17, 2010

With Deepest Sympathy...


It's always difficult to make a sympathy card. For me it brings up such a deep level of compassion and ache for the person suffering the loss. Recently one of our former designers at Magnolia-licious lost her husband. I just can't image having to face the rest of life without my best friend and constant companion.

While I was recovering from my most recent bout of surgery, to keep myself busy while I was so sore I did some more stitching. This is one of those cards. Even though I had no idea at the time how I would use this card, when I heard of Becca's husbands death, I began to hunt around for an image that would go well with this pattern without being too "cutsie". I decided that since I couldn't send her flowers I could certainly have them on a card and send that. So here is the sympathy card I made for her.


I left sufficient space to write a personal note and hope that she was encouraged even in some small way by the card. I mailed it out last week, so I thought it was safe to post it now. My apologies for not having a card recipe, I know I wrote everything down on a post it note, but I can't find it!

Thanks for stopping by my blog.

Hugs,
Barb

Saturday, November 13, 2010

Wrapped in Stitches...


I love doing stitching cards. It's always such a relaxing process, and finding a design that will work well with my Tilda's is a challenge I thoroughly enjoy. I made this card for the Magnolia Ink Contest, but the magazine is now published and this didn't make the cut. So now I can show you my card.

My favorite memories are of brightly colored ornaments and sparkling lights on the branches of our Christmas Tree. So for this card I stitched the pattern and then stamped and colored Wrapped Tilda on the stitching panel, then stamped her again on Cryogen White and colored her with my Copic markers, cut her out and popped her on top.

Here is my card front...


I used a gold cardstock to mat my panel with and layered that onto plain red cardstock. The only other adornment I used was to add three gold pearls to the top and bottom corner of the panel.

This is a closer view of Tilda...


On the inside of the card, I used a piece of dp from The Paper Studio, and sewed it by machine using Gold Metallic embroidery thread. I only had some smaller pieces of the gold cardstock to use for the inside, so I just added some ribbon and a bow, made on my Bow Easy, to adorn the top of the card. On the bottom panel, I needed somewhere to write my Christmas note, so I layered white cardstock onto red and then a piece of the gold. Everything is adhered with Scor-tape. Again I added the gold pearls as a simple accent.


I am entering this card into these Challenges:

Crazy 4 Challenges
Cute Card Thursday
drunken stampers
ABC DT Challenge
My Partner in Crafting Crime


I'm sure there are many more challenges this one could fit into, but that's what I found with a limited search.

Thanks for stopping by to visit my blog...

Hugs,
Barb

Thursday, November 11, 2010

Wide, wide as the ocean....


I have just a very quick post today. This is my final Shaker card. For this one I followed the directions given on SCS and made my own shaker.

I found this wonderful ocean paper at my LSS. It's by BoBunny called Paradise Locals. Even though it is a double sided paper, I chose to use the 'ocean' side for my card. I have used several Magnolia images on this card. First is #306 Little Mermaid Tilda. I created an underwater scene using #432 Sea Weed. The Seaweed was stamped in Versamark Ink and embossed with Alexandrite Embossing Powder. I purchased this embossing powder from a person who mixed their own colors, so I don't have a source of this specific powder. I will give a detailed recipe at the end of my post for those who are interested in knowing what I used in making this card.

Here is my card...


As you can see I added Dew Drops as the little shaking bits. They are, however, just a little too thick and they don't shake very well. I also added them to some of the circles on the embossed seaweed.

Inside my card I added some Flourishes using the same cardstock as my mats and again I stamped and embossed the seaweed and added some more Dew Drops. The little Sea Horse is mounted on pop dots to have her swimming above the other images. The Sea Horses were stamped on a very different paper that has a swirl texture to it and so reflects the light. They look a bit more shimmer in the photo than IRL.


For the notation portion I repeated the Nestie shape and then added the sentiment, which is from SU, and used one of my Fancy Labels shapes by Spellbinders. Another Seahorse was adhered with pop dots and a couple of Dew Drop 'bubbles' were added.


Here is my card recipe...

Mermaid Tilda ...
Copics Used -
Skin - E00,000,0000
Hair - E13, 15, 17, 18
Bra - EE35, 34, 30, 000
Tail - BG10, 32, R12, B34, B0000 Waterfall Stickles
Bubbles - BG10 and Stardust Stickles

Cardstock - Whisper White, Not Quite Navy (SU)

Seahorses - BG32, 10, B34, 21, R21, Stardust Stickles
Flourishes - Sissix
Dew Drops - I picked out some blue ones from my Spring Bloom bottle
ScorTape, pop dots, FabricTac
Sewing Machine and thread

Monday, November 8, 2010

This kind of happy....


I have another Shaker card for you today! I'm having so much fun with these little shaker pouches that I think I'm going crazy with them. Aren't shaker cards just so much fun to make. If you havent' tried one yet, give it a go and enter into this month's challenge over at the Magnolia-licious Highlites Challenge Blog.

Today's card features the most adorable Tilda in Autumn Leaves image #241 and she is available over at Diana's store, Magnolia-licious.

Here is the front of my card...


Tilda is colored with distress inks on watercolor paper. I didn't keep a list of which colors I used I am sorry to say.

For the little shaker parts inside the pouch I punched out little hearts in various autumn colors. I didn't have a small leaf punch and I thought the littel heart shapes would work out just fine. The scalloped circle shape was made with my Nestability die and a pearl added to each scallop. The Ribbon is from my stash as is the little charm. The tag was cut with my Cricut and I distressed the edges and tied it to the bow using linen thread from SU. As always, my panels are all stitched by machine.

Here is a closer look at Tilda...


Here is a side view of my shaker pouch. I purchased these from my LSS and they are made by Impression Obsession. They come in various sizes and shapes.


I kept the inside of this card very simple! I use the Tear Drop Martha Stewart Punch along the top panel and then added a bow with a little maple leaf charm. The bottom pan simple repeats the circle shape from the outside of the card.


Rather a short post today, but I hope you have enjoyed looking at another shaker card.

Hugs,
Barb